Unknown Place · Puzzle walkthrough
Solve the Clock and Open the Garden Memory
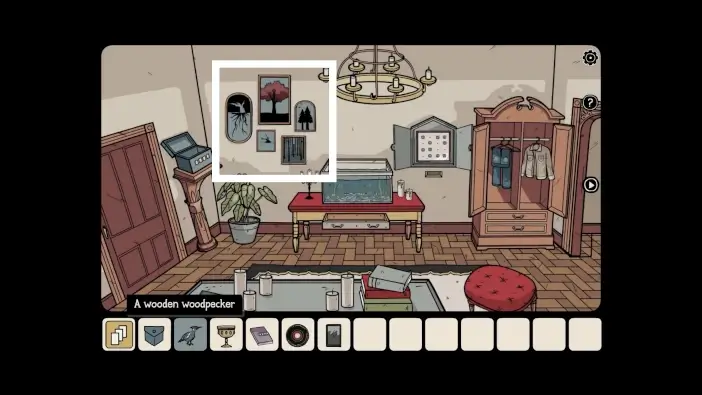
Quick answer
After the Bar, open the blue box with the drink clue and fit its gear into the clock. Set red to sun, yellow to moon and blue to star. Put the wooden bird in the tree picture; its note solves the wall maze shown below. Use the rewarded ring on the floor hatch for the Garden photo.
On this page
Before you begin
Before you begin
- Unlock and complete the Bar memory; its drink provides the clue for the blue box in the Unknown Place.
Follow the clues
- 01
Use the Bar clue to get the clock gear
Return to the Unknown Place from the memory menu. Use the clue from the drink you brought back from the Bar on the blue box near the clock. Take the gear from inside and fit it into the clock mechanism.
You’ll know it worked: The clock can now be set using the colored-symbol clue.
- 02
Set the clock from the curtain clue
Inspect the clue behind the red curtain. Match the clock hands by color: red to the sun, yellow to the moon, and blue to the star. Take the bird released by the clock.
You’ll know it worked: The clock gives you the wooden bird.
- 03
Reveal the wall-button clue
Place the wooden bird on the tree in the framed picture and take the revealed note. At the wall panel, move the three symbol markers through the maze to the positions in the completed picture below. Keep each marker matched to its own symbol: the upper symbol sits in the top corridor, the two-dot symbol in the right-middle corridor, and the three-line symbol in the lower corridor. Take the metal ring from the opened compartment.
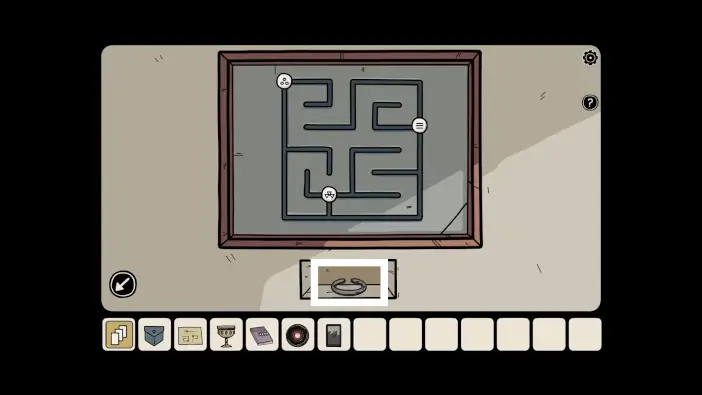
Completed panel; match all three marker symbols and routes to the note from the painted tree. Game image © Dark Dome; capture by Play Games Wiki. View the source walkthrough ↗ You’ll know it worked: The wall puzzle opens and gives you a metal ring.
- 04
Open the floor hatch
Use the ring on the floor trapdoor and take the photograph inside. Select the photograph from the inventory/memory menu to enter the Garden memory.
You’ll know it worked: The Garden location becomes available in the memory menu.
If you’re still stuck
The blue box will not open.
This clue comes from the drink obtained at the end of the Bar memory. Finish that memory and return to the Unknown Place before trying the box.
What is the clock-hand order?
Use the symbols behind the red curtain: red hand to the sun, yellow hand to the moon, and blue hand to the star.
I have the bird but the wall puzzle is still closed.
Place the bird on the tree in the framed picture and collect the note first. The completed wall-maze image in step 3 shows the three final marker positions. Check the symbols as well as their locations, then take the ring.
Sources and scope
Based on published mobile walkthroughs and the source captures credited below. Current-release and PC parity have not been tested hands-on. Checked 2026-09-23.